
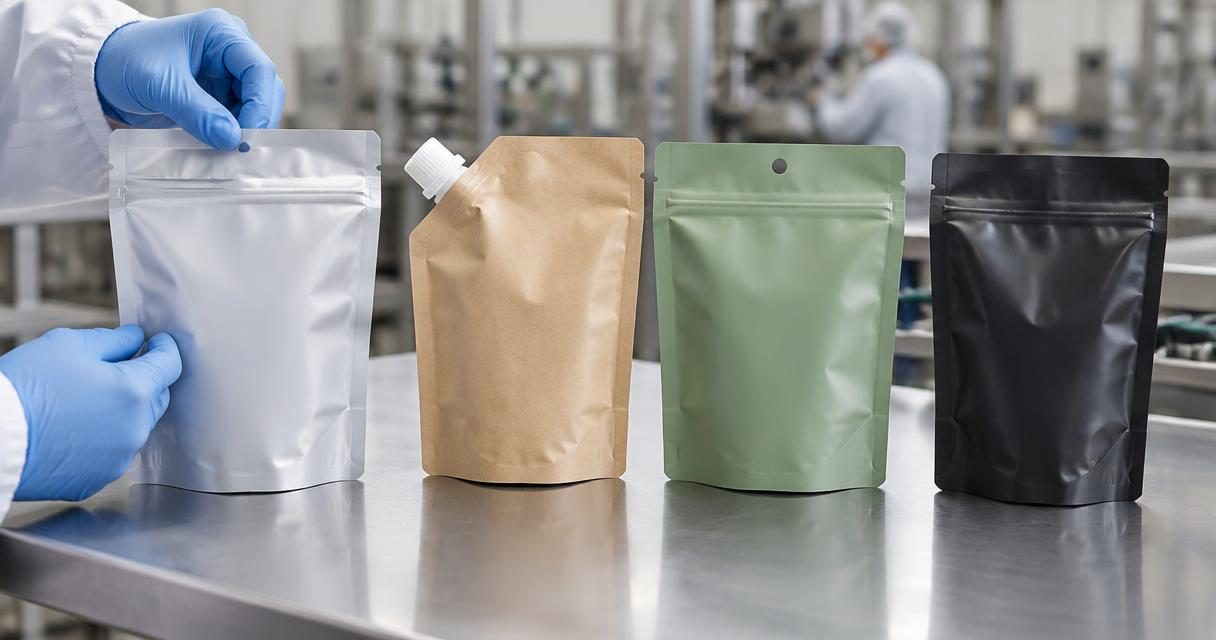
Choose pouch add-ons around two sequences: how the package gets filled and how the customer uses it. A zipper that works well on an empty sample may be difficult to close after powder enters its tracks. A hang hole that looks centered on artwork may interfere with the opening path or fail under the filled package’s weight.
The right stand up pouch features solve a defined handling, dispensing, storage, or merchandising problem. They also create constraints. Before approving a drawing, connect each feature to the product, filling equipment, distribution conditions, and intended shelf life. Final structures and settings require validation across all four—not just approval of an attractive prototype.
Start with the use and filling sequence
Write a short operating story before selecting hardware. Who opens the pouch, what do they remove, how often do they reclose it, and where does the package go afterward? Then document the production sequence from pouch loading through final inspection.
For example, a multi-serving snack may need easy hand access and reliable consumer reclosure. A refill liquid may need controlled pouring and compatibility with a specific receiving container. Those needs point toward different features, even when both products use stand-up pouches.
Record these inputs:
- Product behavior: dusty, oily, granular, viscous, gas-releasing, or prone to clumping.
- Filling route: through an open pouch mouth or a fitment.
- Intended opening and dispensing action.
- Storage after opening and expected number of uses.
- Shelf, peg, case, and parcel handling conditions.
Assign an owner to each unresolved requirement. Operations should confirm equipment interfaces; quality should define acceptance criteria; marketing should confirm the opening instructions. Use the Quantum Flex Pack capabilities page as a starting point for discussion, then confirm whether the proposed feature combination is available and appropriate for the application.
Specify zipper performance and placement
Match the closure to the product
Do not specify only a resealable zipper. State what it must do: open without excessive effort, reclose with practical finger pressure, tolerate expected product contact, and remain usable through the intended consumption period.
Different zipper profiles and slider arrangements have different operating characteristics. Request samples and test them with the actual product rather than assuming one design handles every powder or particle size. A zipper is generally a consumer reclosure feature; do not assume it provides the unopened package’s hermetic seal or restores original shelf life after opening.
Dimension the usable opening
Locate the zipper relative to the pouch edge, final top seal, and intended tear path. Confirm clearance for filling nozzles, grippers, seal jaws, and consumer fingers. For scoop-dispensed products, verify that the scoop passes through the actual opening without forcing the zipper ends apart.
Also establish whether pouches arrive with zippers open or closed and who opens them before filling. That detail can affect labor and machine operation.
A powdered drink mix illustrates the tradeoff: lowering the zipper may improve finger access above it, but can reduce usable filling space or bring product closer to the tracks. Resolve placement on a dimensioned drawing, using a pouch manufacturing specification reference to organize the review—not to substitute for a line trial.
Make tear notches work with the top seal
A tear notch starts an opening; it does not guarantee that the tear travels cleanly across the pouch. Tear behavior depends on the finished construction, notch geometry, material orientation, and any additional opening treatment.
Specify the notch location from a fixed reference, with an agreed tolerance. The intended opening path should remove the sealed header while leaving the zipper intact and accessible. Keep the notch away from the product cavity and preserve the necessary seal area.
If a score or other tear-control treatment is proposed, ask how its depth and position are controlled and whether it affects barrier or package integrity. A notch and a score serve related but different functions.
Test opening with filled, sealed samples. Check whether users can grip the header, start the tear, and complete it without scissors or damage to the reclosure. Include the intended user group where practical; an opening that works for a packaging engineer may still be awkward for someone with limited hand strength.
For a retail pouch with a hang hole, test opening after peg display as well. The hole and tear path should not combine to create an unintended weak point.
Treat spouts and caps as a filling system
Spouts introduce interfaces among the pouch, fitment, cap, filling nozzle, and consumer. Specify the complete assembly rather than selecting a cap by appearance.
Start with product flow. Viscosity, particle size, temperature, and foaming can affect the practical opening size and filling method. A thick sauce with particulates needs a different evaluation than a free-flowing liquid. Do not select an orifice from viscosity alone.
Confirm:
- Spout position and orientation, including handling clearance.
- Whether filling occurs through the spout or another opening.
- Nozzle interface and fitment support during filling.
- Cap application method and supplier-recommended torque range.
- Seal or liner requirements and any tamper-evident element.
- Consumer grip, pouring control, and residual product removal.
Validate the fitment-to-pouch seal separately from the cap closure. Either interface can become a leak path. Test cap removal and reapplication after relevant conditioning, because temperature and product contact can affect performance.
If hot filling, freezing, or another demanding process is involved, explicitly qualify the entire pouch-and-fitment system for it. A familiar-looking spout is not evidence of process suitability. Likewise, an ordinary cap should not be represented as child-resistant without applicable testing and substantiation.
Place hang holes around real retail loads
Hang holes need a merchandising requirement, not just a preferred shape. Ask the retailer or display supplier about peg geometry, spacing, and allowable package weight. Confirm that the filled pouch hangs as intended without blocking adjacent products.
Position the hole in a non-product header area with adequate material around it. Keep it clear of the product cavity, required seals, zipper, and intended opening path. A dimension that works on flat artwork may leave too little support once the pouch is filled and handled.
Use filled samples to evaluate sustained hanging, repeated removal, and foreseeable handling. Include relevant environmental conditioning if heat or humidity could affect the finished package. Inspect for elongation, tearing, distortion, and damage near seals.
For example, a pouch of dense hardware pieces may place much more stress on its header than a similarly sized pouch of lightweight snacks. Do not transfer a hole design between those applications without testing.
If the package must both stand and hang, assess both presentations. The header should support peg display without making opening or shelf presentation unnecessarily awkward.
Use valves only for a defined gas-release need
A one-way degassing valve may be relevant when the product releases gas after packing, as some roasted coffee products do. It is not a general freshness upgrade for every pouch.
Define the gas-release need, desired package behavior, and sensitivity to oxygen or moisture. Ask the valve supplier about operating characteristics and application requirements. Then assess performance with the actual product and package.
Valve placement must account for product contact, dust, filling conditions, and access for inspection. Confirm whether the design requires measures to limit blockage and whether installation creates additional integrity checks.
Do not assume that adding a valve compensates for unsuitable barrier performance, poor seals, or an unvalidated shelf-life target. It also does not establish food safety.
For products with no demonstrated gas-release requirement, leaving the valve out may avoid an unnecessary component and inspection step. The decision should follow measured product behavior and shelf-life work, not the appearance of competing packages.
Check feature interactions before artwork approval
Review all features on one controlled drawing. Separate approvals for the zipper, notch, hole, and spout can miss conflicts that become obvious only when the elements are overlaid.
Mark seal zones, feature attachment areas, tear paths, equipment contact areas, and essential label information. Include tolerances: nominal clearance is not enough if normal placement variation can cause overlap.
Common conflicts include:
- A tear path that damages the zipper or leaves too little gripping material.
- A hang hole too close to a notch or header edge.
- A spout that interferes with a gripper, guide, or case-packing pattern.
- A valve positioned where product can obstruct it.
- Opening instructions removed with the tear-off strip when consumers still need them.
Ask whether each feature earns its added complexity. For a single-use portion, a zipper may add little consumer value. For a refill product, a spout may address a genuine spill-control problem.
Compare the total operating effect, not just the component cost. Extra inspection, slower handling, or damaged packages can change the decision. The flexible packaging cost guide provides broader context for discussing those tradeoffs without assuming a universal feature premium.
Validate features on the intended line
Separate component checks from system checks
Begin with drawings and samples, then move to representative production trials. Bench testing can identify obvious problems, but it cannot establish compatibility with a specific filling line.
During trials, inspect pouch feeding, opening, product dosing, contamination near closures, sealing, cap application where relevant, and discharge handling. Document the conditions tested rather than recording only a pass or fail.
Define acceptance criteria before testing
Agree on measurable requirements with the relevant suppliers and quality team. Depending on the application, evaluation may include seal strength, leak testing, opening force, reclosure cycles, cap torque, hanging performance, and distribution simulation. Select methods suited to the package; no single test establishes every aspect of integrity.
Check normal startup, planned operating speeds, stops, and restarts. Where appropriate, assess expected variation in product temperature, fill level, and component dimensions.
Retain samples for shelf-life evaluation under relevant storage conditions. Confirm that feature attachment and repeated consumer use do not create unacceptable changes. Accelerated studies may support decisions, but their relevance to actual product deterioration needs justification.
Release final structures and operating settings only after product, equipment, distribution, and shelf-life requirements have been addressed. Set change-control rules so a substituted zipper, cap, valve, or feature location receives an appropriate review.
Build a feature approval checklist
Before issuing the final purchase specification, confirm that the team can answer yes to these questions:
- Does every add-on solve a stated product, user, or retail need?
- Are feature dimensions, reference points, and tolerances documented?
- Are the filling route and incoming closure condition defined?
- Has operations confirmed equipment clearance and handling compatibility?
- Are seal areas and opening paths protected from interference?
- Have filled samples been evaluated for opening, dispensing, and reclosure?
- Are distribution, storage, and shelf-life evaluations appropriate to the application?
- Are acceptance criteria, inspection responsibilities, and change controls recorded?
Keep the approved drawing, component identifiers, trial records, and retained samples together. This gives purchasing and operations a common reference when ordering, receiving, or investigating a problem.
Bring your product details, equipment information, proposed features, and validation requirements to discuss your pouch project with Quantum Flex Pack. A focused review can help identify the questions to resolve before the specification is finalized.